
Product Details
4M Easy-to-Do Crochet Kit – DIY Arts & Crafts Yarn Gift for Kids & Teens, Boys & Girls
Free Shipping+Easy returns

Product Details
Crochet Cute Critters: 26 Easy Amigurumi Patterns
Free Shipping+Easy returns

Product Details
ALEX Toys Craft Happily Ever Crafter
Free Shipping+Easy returns

Product Details
Make It Real – Disney Frozen 2 Queen Iduna’s Knitted Scarf . DIY Arts and Crafts Kit Guides Kids to Crochet Queen Iduna’s Shawl with Acrylic Yarn and Magical Frozen 2 Embellishments
Free Shipping+Easy returns

Product Details
ALEX Toys Craft Cool Crocheting Kit
Free Shipping+Easy returns

Product Details
ALEX Toys Craft Hip to be Square Crochet
Free Shipping+Easy returns
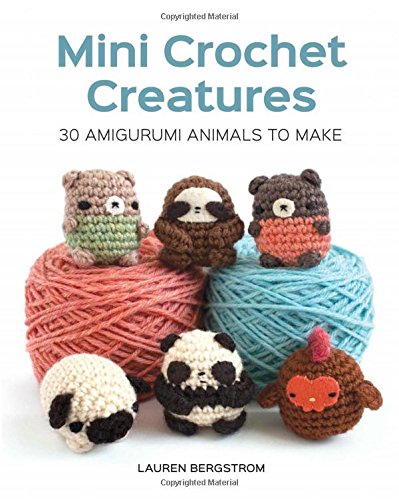
Product Details
Mini Crochet Creatures: 30 Amigurumi Animals to Make
Free Shipping+Easy returns

Product Details
Plastic Safety Eyes and Noses with Washers 570 Pcs, Craft Doll Eyes and Teddy Bear Nose for Amigurumi, Crafts, Crochet Toy and Stuffed Animals (Assorted Sizes)
Free Shipping+Easy returns

Product Details
Crochet Horses & Ponies: 10 Adorable Projects for Horse Lovers (Crochet Kits)
Free Shipping+Easy returns

Product Details
Crochet Dogs: 10 Adorable Projects for Dog Lovers (Crochet Kits)
Free Shipping+Easy returns

Product Details
Melissa & Doug Wooden Multi-Craft Weaving Loom (Arts & Crafts, Extra-Large Frame, Develops Creativity and Motor Skills, 16.5" H x 22.75" W x 9.5" L)
Free Shipping+Easy returns

Product Details
Creativity for Kids Quick Knit Loom – Make Your Own Pom Pom Hat And Accessories For Beginners (Packaging May Vary)
Free Shipping+Easy returns
knitting

My daughters love themed animals and are a big inspiration to my patterns. After making my amigurumi cow, I knew I wanted to create a farm theme. The next installment is here, these sweet little ducks! (Funny enough, when I started designing them they were chicks. After frogging and trying to get the details to match what I pictured in my head, they started to look more and more like ducks. My awesome pattern testers helped me pinpoint which animal they should be!) If you are new to amigurumi be sure to check out my tips and materials page to help get you started! By including or excluding the bow and eyelashes this pattern is easily adaptable to make in a boy or girl version! Equally fun is deciding the colors to make them in. Both work up to be about 13 inches tall, perfect cuddling size! If you have any questions along the way or want to share your project with us, join the Grace and Yarn Crochet Group on Facebook! I’ll also keep you updated on new patterns, giveaways and tutorials! In most of my patterns I use plastic safety eyes, they are easy and fast to install. However, they are not recommended for children under 3. If you are making this for a little one or don’t have the size needed on hand, I recommend using my crochet thread eyes as an alternative! You may make and sell items made from this pattern but please do not sell, share or reproduce the actual pattern. If you sell finished items online (Etsy, etc) please provide a link to the pattern and credit to me as the designer, thank you. I hope you enjoy this pattern! This is a free pattern here on my blog, if you would prefer an ad-free printable version you can purchase one for a small fee from Ravelry or Etsy. Don’t forget to PIN this pattern and save to your favorite board! This post contains affiliate links, please click here for more info. Thank you for supporting Grace and Yarn! Materials: Size 4 worsted weight yarn (100g of white or yellow yarn for the body, 25g orange) 3.5 mm crochet hook (these are my favorite to use!) 15mm safety eyes Black crochet/embroidery thread for eyelashes/small amount of choice color for bow (optional) Scissors Tapestry needle (these work wonders for amigurumi with their bent tips) Stuffing (Poly-Fil and Morning Glory are my top favorites!) Stitch markers US Abbreviations: MC- Magic circle SC- Single crochet SC INC- Single crochet increase INV DEC- Invisible decrease DC- Double crochet *Slowly stuff as you go, you want it to be firm but not stretched. You will be working in the round, I like using a stitch marker at the beginning of each round. Legs and Body- Make 2: Using orange Round 1: Create a magic circle with 6 SC Round 2: SC INC in each stitch (12 SC) Round 3: SC in the first stitch, SC INC in the next stitch, repeat around (18 SC) Round 4: SC in the first 2 stitches, SC INC in the next stitch, repeat around (24 SC) Round 5: SC in the first 3 stitches, SC INC in the next stitch, repeat around (30 SC) Round 6: SC around in the back loops only (30 SC) Rounds 7-8: SC around (30 SC) Round 9: SC in the first 9 stitches, INV DEC 6 times, SC in the last 9 stitches (24 SC) Round 10: SC in the first 6 stitches, INV DEC 6 times, SC in the last 6 stitches (18 SC) Rounds 11-22: SC around (18 SC) Fasten off (When you finish the 2nd leg do not fasten. At the end of Round 22 on the 2nd leg, complete a SC in each of the next 6 stitches, this will line up your legs to be straight when we join. Round 23 joins the legs together and starts the body.) Round 23: Chain 3 and attach to the first leg with a SC (be sure both feet are facing the same direction), SC in the remaining stitches around the leg, when you reach the chain make a SC across each of the 3 chains, SC in the remaining stitches of the next leg and SC across each of the 3 chains (42 SC) This completes your join and is where your next round will start. Round 24: SC in the first 6 stitches, SC INC in the next, repeat around (48 SC) Change to body color Round 25: SC around (48 SC) Round 26: SC in the first 7 stitches, SC INC in the next, repeat around (54 SC) Rounds 27-38: SC around (54 SC) Round 39: SC in the first 7 stitches, INV DEC in the next, repeat around (48 SC) Round 40: SC around (48 SC) Round 41: SC in the first 6 stitches, INV DEC in the next, repeat around (42 SC) Round 42: SC around (42 SC) Round 43: SC in the first 5 stitches, INV DEC in the next, repeat around (36 SC) Round 44: SC around (36 SC) Round 45: SC in the first 4 stitches, I
NV DEC in the next, repeat around (30 SC) Rounds 46-47: SC around (30 SC) Fasten off and leave a long tail for sewing Head- NOTE: This head will be worked from the top down, meaning the first few rounds will be the top of the head and our closing rounds at the end will be the bottom of our head. Round 1: Create a magic circle with 6 SC Round 2: SC INC in each stitch around (12 SC) Round 3: SC in the first st, SC INC in the next, repeat around (18 SC) Round 4: SC in the first 2 stitches, SC INC in the next, repeat around (24 SC) Round 5: SC in the first 3 stitches, SC INC in the next, repeat around (30 SC) Round 6: SC in the first 4 stitches, SC INC in the next, repeat around (36 SC) Round 7: SC in the first 5 stitches, SC INC in the next, repeat around (42 SC) Round 8: SC in the first 6 stitches, SC INC in the next, repeat around (48 SC) Round 9: SC in the first 7 stitches, SC INC in the next, repeat around (54 SC) Rounds 10: SC in the first 8 stitches, SC INC in the next, repeat around (60 SC) Rounds 11-20: SC around (60 SC) NOTE: Here is where we will attach the safety eyes. Place them 6 stitches apart between rounds 15-17 (If you would like eyelashes you will want to sew them on before securing your safety eyes) Round 21: SC in the first 8 stitches, INV DEC in the next, repeat around (54 SC) Round 22: SC in the first 7 stitches, INV DEC in the next, repeat around (48 SC) Round 23: SC in the first 6 stitches, INV DEC in the next, repeat around (42 SC) Round 24: SC in the first 5 stitches, INV DEC in the next, repeat around (36 SC) Round 25: SC in the first 4 stitches, INV DEC in the next, repeat around (30 SC) Round 26: SC in the first 3 stitches, INV DEC in the next, repeat around (24 SC) *Continue to stuff the head firmly Round 27: SC in the first 2 stitches, INV DEC in the next, repeat around (18 SC) Round 28: SC in the first stitch, INV DEC in the next, repeat around (12 SC) Round 29: INV DEC around (6 SC) Fasten off and sew remaining part closed, weave in your end Beak- With orange Round 1: Create a magic circle with 6 SC Round 2: SC INC in each stitch around (12 SC) Round 3: SC in the first stitch, SC INC in the next, repeat around (18 SC) Rounds 4-7: SC around (18 SC) Fasten off leaving a long tail for sewing Sew centered between the eyes, stuffing lightly. Options: you can flatten the beak to make a more rectangular bill (example on the white duck) or leave as a circle for a rounded beak (as on the yellow duck). Wings- Make 2 Round 1: Create a magic circle with 6 SC Round 2: SC INC in each stitch around (12 SC) Round 3: SC in the first stitch, SC INC in the next, repeat around (18 SC) Round 4: SC in the first 2 stitches, SC INC in the next, repeat around (24 SC) Round 5: SC in the first 3 stitches, SC INC in the next, repeat around (30 SC) Rounds 6-8: SC around (30 SC) Round 9: SC in the first 3 stitches, INV DEC in the next, repeat around (24 SC) Rounds 10-12: SC around (24 SC) Round 13: SC in the first 2 stitches, INV DEC in the next, repeat around (18 SC) Rounds 14-22: SC around (18 SC) At the end of round 22 pinch the wing flat and make 8 SC across the top to close, fasten off and leave a long tail to sew onto the body Tail- Round 1: Create a magic circle with 6 SC Round 2: SC INC in each stitch around (12 SC) Rounds 3-4: SC around (12 SC) Round 5: SC in the first stitch, SC INC in the next, repeat around (18 SC) Round 6: SC around (18 SC) Round 7: SC in the first 6 stitches, SC INC in the next 6 stitches, SC in each of the last 6 stitches (24 SC) Round 8: SC around (24 SC) Round 9: *SC in the first 6 stitches, SC INC in the next 3 stitches*, repeat from * one more time, SC in the last 6 stitches (30 SC) Round 10: SC around (30 SC) Round 11: SC in the first 6 stitches, SC INC in the next 3 stitches, SC in the next 12 stiches, SC INC in the next 3 stitches, SC in the last 6 stitches (36 SC) Fasten off leaving a long tail for sewing Attaching everything together- Sew the head onto the body, making sure to have the facial features centered. Add extra stuffing as you go to keep it firm and less wobbly. Next sew the wings onto the body centered with the head at round 46. Sew the tail centered on the back of the body, lightly stuffing as you go. Optional Bow- Working in a magic circle make 7 DCs, slip stitch, 7 DCs, and slip stitch again, pull your string tight and wrap it around the middle of the bow 4 times. Tie/secure in the back and cut your string leaving a long section to sew with. Sew onto your favorite side of the head! Your duck is complete! I hope you have enjoyed making this pattern. Let me know if you have any questions with this pattern or any of my other patterns, I would be happy to help. So, what farm animal would you like to see next in the series?
Grace and Yarn

Amigurumi Happy Bears Crochet Pattern gratuito – gratuito #Amigurumi; #Orso; Modelli di stoffa all’uncinetto Amigurumi Little Bat Crochet Pattern gratuitoPinguino di Amigurumi – Un modello di…Schema uncinetto gratuito per mouse Amigurumi… C’è qualche congettura sulle origini di Crochet. Alcuni credono che sia stato avviato in Estremo Oriente, Medio Oriente o paesi del Sud America. Il …
Crafty

Make a cute monkey toy. monkey crochet patterns- toy crochet pattern- amigurumi … Make a cute monkey toy. monkey crochet patterns- toy crochet pattern- amigurumi amorecraftylife.com #crochet #crochetpattern #diy Related posts:Kleine Stickstiche machen kleine…
Amigurumi Animal

Here are another beautiful sleepy-time bears that sets a good example to the young ones, that it’s time to go to bed and rest up for next day’s play and learning. Teddy Bear in PJs Free Crochet Pattern This cute little guy has adorable yellow PJ’s a star-shaped pillow, a
crochet stuffy

Turkey Free Amigurumi Pattern. Crochet this turkey for Thanksgiving with this free crochet pattern! Visit our site to make it now.
Амигуруми

Do you love crochet teddy bear patterns? Of course, who does not love them? They are cute and beautiful and have a lot of capacity to make anyone’s day more special and lovely. Teddy bears are often used to gift someone on any of the occasion and they are one of those gifts that can be given any of the people of all ages. And no one denies accepting these beautiful and cute teddy bears given by their lovers. People do not only accept them happily but also love to hug them, cuddle and sleep with them the whole night.
crochet patterns

*This post contains affiliate links. If you purchase an item from a link below I will receive a small commission at no extra cost to you. This helps keeps the free patterns flowing! All links are to products that I use and love, thank you for supporting Grace and Yarn! For more information check out our disclosure here. Happy Friday friends! I’m excited to share this fun new pattern with you! A little while back I ordered some Lion Brand Feels Like Butta yarn, I wanted to see what all the
hype was. The feel was extra squishy and feathery soft! While this yarn would be lovely for a garment I had amigurumi in mind (as always)! I had two different shades of pink and flamingos instantly popped into my head. Also around this time two of my nieces were celebrating their 4th birthday and their room is decorated with flamingos, I couldn’t resist! In case I needed an extra reason to get these on my hook, we visited our local wildlife park and I fell in love with the flamingos there! Do you get inspired when you’re out and about for new crochet projects? I made these two in a mini version but as soon as I finished them I felt we needed a larger version too (you can find her here!). In a standing position these mini flamingos are about 8 inches tall (5.5 in a sitting position). If you’d prefer they end up a little bigger they would be super cute with a chunky (weight 5) yarn and 4mm or 4.5mm crochet hook! I used Feels Like Butta Yarn in Dusty Pink and Pink to make these two feathered friends, but you can use any weight 4 yarn you prefer. I did notice it seemed on the thinner side when compared to I Love This Yarn or Yarn Bee (my usual go to for amigurumi). If using a different yarn your flamingo may end up just a pinch taller. I will definitely be using Feels Like Butta again, in fact I went back and ordered it in yellow, white and a beautiful light blue! I’m not sure what I’ll make with them yet but I love the soft feel of the yarn and the squish factor is comforting! For this pattern the body and head are made as one piece. To help ensure a strong neck you will want to have tight stitches and firm stuffing. Be sure to stuff your body before beginning your neck as you won’t have a large opening to work with. If you find your stitches are running on the loose side try going down a half size in your hook. More Helpful Tips for Amigurumi How to Stuff Your Amigurumi Tips to Learning Amigurumi Crochet Eye Tutorial (for those times you don’t have the right size on hand) Let’s stay connected! Sign up for our newsletter here to be notified of new patterns, tutorials and giveaways! Be sure to also join the Grace and Yarn Crochet Group on Facebook and connect with others who love to crochet! Pattern PIN to save to your favorite crochet board! Grab the ad-free PDF version in my Etsy or Ravelry shop! You may make and sell items made from this pattern but please do not sell, share or reproduce the actual pattern. If you sell finished items online (Etsy, etc) please provide a link to the pattern and credit to me as the designer, thank you. I hope you enjoy this pattern! Materials – Size 4 worsted weight yarn (50g of light or dark pink; small amount of white, grey, and beige) 3.5 mm crochet hook (these are the hooks I use) 9mm safety eyes Black crochet/embroidery thread for eyelashes (optional) Scissors Tapestry needle (bent tip needles work great for amigurumi) Stuffing Stitch markers (a piece of scrap yarn will also do the trick) Abbreviations – US terminology MC- Magic circle SC- Single crochet SC INC- Single crochet increase INV DEC- Invisible decrease DC – Double crochet St(s)- Stitch(es) Sl st – Slip stitch NOTES – – Slowly stuff as you go, you want it to be firm but not stretched. You will be working in the round; I like to use a stitch marker at the beginning of each round. – The body and head will be made as one piece. I recommend tight stitches and firm stuffing to help avoid a wobbly neck. Beak – With grey Round 1: Create a magic circle with 6 SC Round 2: SC around (6) Round 3: SC INC in each st (12) Round 4: SC around (12) Change to white Rounds 5-6: SC around (12) Fasten off leaving a long tail for sewing onto the head. Body – With pink Round 1: Create a magic circle with 6 SC Round 2: SC INC in each st (12) Round 3: SC in the first st, SC INC in the next, repeat around (18) Round 4: SC in the first 2 sts, SC INC in the next, repeat around (24) Round 5: SC in the first 3 sts, SC INC in the next, repeat around (30) Round 6: SC in the first 4 sts, SC INC in the next, repeat around (36) Round 7: SC in the first 5 sts, SC INC in the next, repeat around (42) Rounds 8-12: SC around (42) Round 13: SC in the first 5 sts, INV DEC in the next, repeat around (36) Round 14: SC in the first 4 sts, INV DEC in the next, repeat around (30) Round 15: SC in the first 3 sts, INV DEC in the next, repeat around (24) Round 16: SC in the first 2 sts, INV DEC in the nex,t repeat around (18) Round 17: SC in the first st, INV DEC in the next, repeat around (12) Rounds 18-23: SC around Here is where we will start the head Round 24: SC in the first st, SC INC in the next, repeat around (18) Round 25: SC in the first 2 sts, SC INC in the next, repeat around (24) Round 26: SC in the first 3 sts, SC INC in the next, repeat around (30) Round 27: SC in the first 4 sts, SC INC in the next, repeat around (36) Round 28: SC in the first 5 sts, SC INC in the next, repeat around (42) Rounds 29-34: SC around (42) NOTE: Here is where we will attach the facial features. Place the safety eyes 6 stitches apart between rounds 31 and 32. (For a girl version, I recommend sewing on the eyelashes before securing your safety eyes). Beak – Sew the beak centered between the eyes with a small amount of stuffing. Cheeks – With your tapestry needle and yarn for cheeks pass through one stitch on either side of your beak just under the eyes. (Be sure to stuff the neck and shoulders firmly as you go. This will keep the neck sturdy.) Round 35: SC in the first 5 sts, INV DEC in the next, repeat around (36) Round 36: SC in the first 4 sts, INV DEC in the next, repeat around (30) Round 37: SC in the first 3 sts, INV DEC in the next, repeat around (24) Round 38: SC in the first 2 sts, INV DEC in the next, repeat around (18) Round 39: SC in the first st, INV DEC in the next, repeat around (12) Round 40: INV DEC around (6) Fasten off and sew remaining part closed, weave in your end. Tail- With pink Round 1: Create a magic circle with 6 SC Round 2: SC INC in each st (12) Rounds 3-4: SC around (12) Round 5: SC in the first 3 sts, SC INC in the next 6, SC in the last 3 sts (18) Round 6: SC around (18) Round 7: SC in the first 6 sts, SC INC in the next 6, SC in the last 6 sts (24) Round 8: SC around (24) Fasten off leaving a long tail for sewing. Wings- Starting with pink, make 2 Round 1: Create a magic circle with 6 SC Round 2: SC INC in each st (12) Round 3: SC in the first st, SC INC in the next, repeat around (18) Rounds 4-8: SC around (18) Do not fasten off, we will now work across the top in rows. Row 1: Fold flat (as pictured below) and make 9 SC across the top making sure to go through both top stitches. Leaving a long tail of your pink yarn change to white for the last row. Row 2: *2 DC in the first st, sl st into the next*, *repeat across ending with 2 DC into the last st (this creates the feathers). Fasten off and weave in your white strand. Legs – With beige make 2, lightly stuffing as you go Round 1: Create a magic circle with 7 SC Rounds 2-12: SC around (7) Fasten off leaving a long tail for sewing. Assembly – – First, sew the tail centered onto the back of the body stuffing as you go. – Next, sew the wings centered with the facial features and a slight angle upward as pictured below. – Lastly, sew the legs onto the bottom of your flamingo starting at the 2nd round and ending at the 6th round. Your mini flamingo is complete! Feel free to share your flamingo with us in the group, we’d love to see them! Love free patterns? Check out our latest One More Row free crochet link party! Free designs are submitted by various designers throughout the month and your clicks help decide the top 5 patterns that will be featured in next months party! If you’re a designer feel free to link up a free pattern, we’d love to share it! Thanks so much for stopping by!